OCI CLI・Ansible OCI modulesを入れてみる
Oracle Cloud always free Advent Calendar 2019の8日目です。
昨日はAnsibleをインストールしましたが、本日はそれに続き、OCI CLIとOCI Ansibleモジュールをインストールします。
(昨日インストールしたansible環境が前提です)
#OCI CLIのインストール
[opc@docker ~]$ sudo yum -y install python-oci-cli
#USER OCID,Tenancy OCID,Compartment OCIDの確認(Oracle Cloudの管理コンソール)
USER OCID ・・・・ アイデンティティ->ユーザー で確認したいユーザのOCIDの「表示」をクリックします。
Tenancy OCID・・・ 管理->テナンシ詳細 で確認したいテナンシのOCIDの「表示」をクリックします。
Compartment OCID・ アイデンティティ->コンパートメントで確認したいユーザのコンパートメントの「表示」をクリックします。
#configファイルおよび公開鍵の作成
[opc@docker ~]$ oci setup config
This command provides a walkthrough of creating a valid CLI config file.The following links explain where to find the information required by this
script:User OCID and Tenancy OCID:
https://docs.cloud.oracle.com/Content/API/Concepts/apisigningkey.htm#Other
Region:
https://docs.cloud.oracle.com/Content/General/Concepts/regions.htm
General config documentation:
https://docs.cloud.oracle.com/Content/API/Concepts/sdkconfig.htm
Enter a location for your config [/home/opc/.oci/config]:
Enter a user OCID: ocid1.user.oc1..aaaaaaaariv62l6vabhcskbpj6ytb5i4ymm2s5p3hvnvedvhv27bs623opmq
Enter a tenancy OCID: ocid1.tenancy.oc1..aaaaaaaab2snt4bpmiq72kxirfn6sdcsappqa3fk3sljtbfjtkxsc3pmnfca
Enter a region (e.g. ap-mumbai-1, ap-seoul-1, ap-sydney-1, ap-tokyo-1, ca-toronto-1, eu-frankfurt-1, eu-zurich-1, sa-saopaulo-1, uk-london-1, us-ashburn-1, us-gov-ashburn-1, us-gov-chicago-1, us-gov-phoenix-1, us-langley-1, us-luke-1, us-phoenix-1): ap-tokyo-1
Do you want to generate a new RSA key pair? (If you decline you will be asked to supply the path to an existing key.) [Y/n]: Y
Enter a directory for your keys to be created [/home/opc/.oci]:
Enter a name for your key [oci_api_key]:
Public key written to: /home/opc/.oci/oci_api_key_public.pem
Enter a passphrase for your private key (empty for no passphrase):
Private key written to: /home/opc/.oci/oci_api_key.pem
Fingerprint: ee:1a:98:69:8a:be:34:28:31:c4:7b:1e:1a:19:d9:f6
Config written to /home/opc/.oci/config
If you haven't already uploaded your public key through the console,
follow the instructions on the page linked below in the section 'How to
upload the public key':https://docs.cloud.oracle.com/Content/API/Concepts/apisigningkey.htm#How2
#公開鍵の確認
[opc@docker ~]$ cat ~/.oci/oci_api_key_public.pem
-----BEGIN PUBLIC KEY-----
MIIBIjANBgkqhkiG9w0BAQEFAAOCAQ8AMIIBCgKCAQEAsFb2vXNqzlrsZSWbaBOY
jFsUMsuIf1OcWJ9o+xP2CEm43wIO5R/5aO52SgQwxY6ZQvaNdpWHU2dYB70sWPny
wRMgB6WBon4AhYVqzXbA+2MMAdUMrYnG0rs0ypqrwmudUIfFiVpOhkRErmqdwk8P
・・・・・・・
-----END PUBLIC KEY-----
#公開鍵の登録
Oracle Cloudの管理コンソールから
アイデンティティ->ユーザー
公開鍵を登録したいユーザのユーザー詳細をクリックします。
APIキー->公開鍵の追加をクリックし、先ほど確認した公開鍵の「-----BEGIN PUBLIC KEY-----」から「-----END PUBLIC KEY-----」までを入力します。
#デフォルトコンパートメント値の設定
[opc@docker ~]$ oci setup oci-cli-rc
Predefined queries written under section OCI_CLI_CANNED_QUERIES
Command aliases written under section OCI_CLI_COMMAND_ALIASES
Parameter aliases written under section OCI_CLI_PARAM_ALIASES
#oci_cli_rcファイルにデフォルトコンパートメントIDの登録
[opc@docker ~]$ vi ~/.oci/oci_cli_rc
[DEFAULT]
compartment-id = ocid1.tenancy.oc1..aaaaaaaab2snt4bpmiq72kxirfn6sdcsappqa3fk3sljtbfjtkxsc3pmnfca
#設定の確認
[opc@docker ~]$oci compute image list
{
"data": [
{
"agent-features": null,
"base-image-id": null,
"compartment-id": null,
"create-image-allowed": true,
"defined-tags": {},
"display-name": "Windows-Server-2016-Standard-Edition-VM-Gen2-2019.10.09-0",
"freeform-tags": {},
"id": "ocid1.image.oc1.ap-tokyo-1.aaaaaaaavlzb37igtmrnftw4ulolbdh5ysjyxqq3d4nv72slraedsrjkwyjq",
"launch-mode": "NATIVE",
"launch-options": {
"boot-volume-type": "PARAVIRTUALIZED",
"firmware": "UEFI_64",
"is-consistent-volume-naming-enabled": false,
"is-pv-encryption-in-transit-enabled": true,
"network-type": "PARAVIRTUALIZED",
"remote-data-volume-type": "PARAVIRTUALIZED"
},
"lifecycle-state": "AVAILABLE",
"operating-system": "Windows",
"operating-system-version": "Server 2016 Standard",
"size-in-mbs": 262144,
"time-created": "2019-10-10T04:03:14.266000+00:00"
},・・・・
#Ansible OCI modulesのインストール
[opc@docker ~]sudo yum -y install oci-ansible-modules
#gitのインストール
[opc@docker ~]sudo yum -y install git#oci-ansible-moduleのサンプルをダウンロード
[opc@docker ~]git clone https://github.com/oracle/oci-ansible-modules.git
#sample playbookを使って、インスタンスの起動/削除
[opc@docker ~]cd ~/oci-ansible-modules/samples/compute/launch_compute_instance#今回、always free(VM.Standard.E2.1.Micro)を使い切っているので、VM.Standard.E2.1で試します。
#export SAMPLE_INSTANCE_SHAPE=VM.Standard.E2.1.Micro
[opc@docker launch_compute_instance]export SAMPLE_INSTANCE_SHAPE=VM.Standard.E2.1
[opc@docker launch_compute_instance]export SAMPLE_IMAGE_OCID=ocid1.image.oc1.ap-tokyo-1.aaaaaaaavafdy6turyejyoteynggaogbvmdcy2zwl5ukgy3mww6ohbmrgs7q
[opc@docker launch_compute_instance]export SAMPLE_COMPARTMENT_OCID=ocid1.tenancy.oc1..aaaaaaaab2snt4bpmiq72kxirfn6sdcsappqa3fk3sljtbfjXXXXXXXXXXXXX
[opc@docker launch_compute_instance]export SAMPLE_AD_NAME=FJrI:AP-TOKYO-1-AD-1
#ansible-playbookの実行
#最後までエラーなく実行できればOK
[opc@docker launch_compute_instance]$ ansible-playbook sample.yaml
[WARNING]: provided hosts list is empty, only localhost is available. Note that the implicit localhost does not match 'all'
PLAY [Launch a compute instance and connect to it using SSH] *********************************************************************************************TASK [Gathering Facts] ***********************************************************************************************************************************
ok: [localhost]TASK [Check pre-requisites] ******************************************************************************************************************************
skipping: [localhost] => (item=SAMPLE_COMPARTMENT_OCID)
skipping: [localhost] => (item=SAMPLE_IMAGE_OCID)
skipping: [localhost] => (item=SAMPLE_AD_NAME)
・・・・・TASK [Print SSH response from launched instance] *********************************************************************************************************
ok: [localhost] => {
"msg": "SSH response from instance -> [u'Please login as the user \"ubuntu\" rather than the user \"opc\".']"
}TASK [Terminate the instance] ****************************************************************************************************************************
changed: [localhost]TASK [Delete the subnet] *********************************************************************************************************************************
changed: [localhost]TASK [Delete the security list] **************************************************************************************************************************
changed: [localhost]TASK [Delete the route table] ****************************************************************************************************************************
changed: [localhost]TASK [Delete the Internet Gateway] ***********************************************************************************************************************
changed: [localhost]TASK [Delete the VCN] ************************************************************************************************************************************
changed: [localhost]PLAY RECAP ***********************************************************************************************************************************************
localhost : ok=38 changed=11 unreachable=0 failed=0
<参考>
ansible入れる
Oracle Cloud always free Advent Calendar 2019の7日目です。
今日は環境構築の要であるansibleを入れます。
〇前提 always free ComputeインスタンスのOracle Linux 7.7
#Ansibleのインストール
#yumリポジトリの最新版2.8.4だと後日実施するoci-anbile-moduleと競合するのでひとつバージョン下げてインストール
[opc@docker ~]$sudo yum -y install ansible-2.7.9
#動作確認
#まずはansible操作対象ファイル(hosts)を作成する。54222はSSH接続ポート[opc@docker ~]$ cat <<EOF > hosts
10.0.0.3:54222
10.0.0.5:54222
EOF#ansibleコマンド実行 各ホストでuname -aを実行する --private-key には秘密鍵のパスを指定する
[opc@docker ~]$ ansible --private-key=id_rsa2 -i hosts -m shell -a "uname -a" all
10.0.0.3 | CHANGED | rc=0 >>
Linux docker 4.14.35-1902.6.6.el7uek.x86_64 #2 SMP Tue Oct 8 07:32:21 PDT 2019 x86_64 x86_64 x86_64 GNU/Linux10.0.0.5 | CHANGED | rc=0 >>
Linux ol77 4.14.35-1902.7.3.el7uek.x86_64 #2 SMP Thu Oct 31 10:06:41 PDT 2019 x86_64 x86_64 x86_64 GNU/Linux
Linux docker 4.14.35-1902.6.6.el7uek.x86_64 #2 SMP Tue Oct 8 07:32:21 PDT 2019 x86_64 x86_64 x86_64 GNU/Linx
<余談>
Oracle Linux7でanbileを導入するには、3パターンがあります。
a. python2のpipからインストール
b. python3.6のpipからインストール
c. yumからインストール
aに関しては、python2が2020年1月にサポート終了になるので、各種モジュールのメンテナンスがいつまで続くかわかりません。
bに関しては、現時点(2019年12月)では、以下の不具合がありうまく動きません。(かなりハマって断念)
https://github.com/pycontribs/selinux/issues/22
RHEL7.8では解消されるようなので、半年後は状況違うかもしれませんが。
現状、まともに使えてパッケージメンテナンスを受けられそうなのが、cのyumからのインストールとなります。
仮想デスクトップサーバとして使う
Oracle Cloud always free Advent Calendar 2019の6日目です。
昨日はguacamoleでリモートゲートウェイを作成しましたが、本日はdockerコンテナで仮想デスクトップサーバを構築します。構築後、guacamoleから接続します。
使用するコンテナイメージは、私がRHEL6ベースにXFCEデスクトップ+XRDPで接続できるように作成したものです。
まず、仮想デスクトップ用のコンテナを起動します。
docker run -d --name xrdp -p 3389:3389 --network $(whoami)_default s4ragent/xfce:ja
次に接続用のユーザとパスワード設定をします。
以下の例はuser:foo password:bar です。
docker exec xrdp bash -c 'useradd foo'
docker exec xrdp bash -c 'echo "foo:bar" | chpasswd'
パスワードが設定できたら guacamoleのsettings->connectionから接続用の設定を作成します。
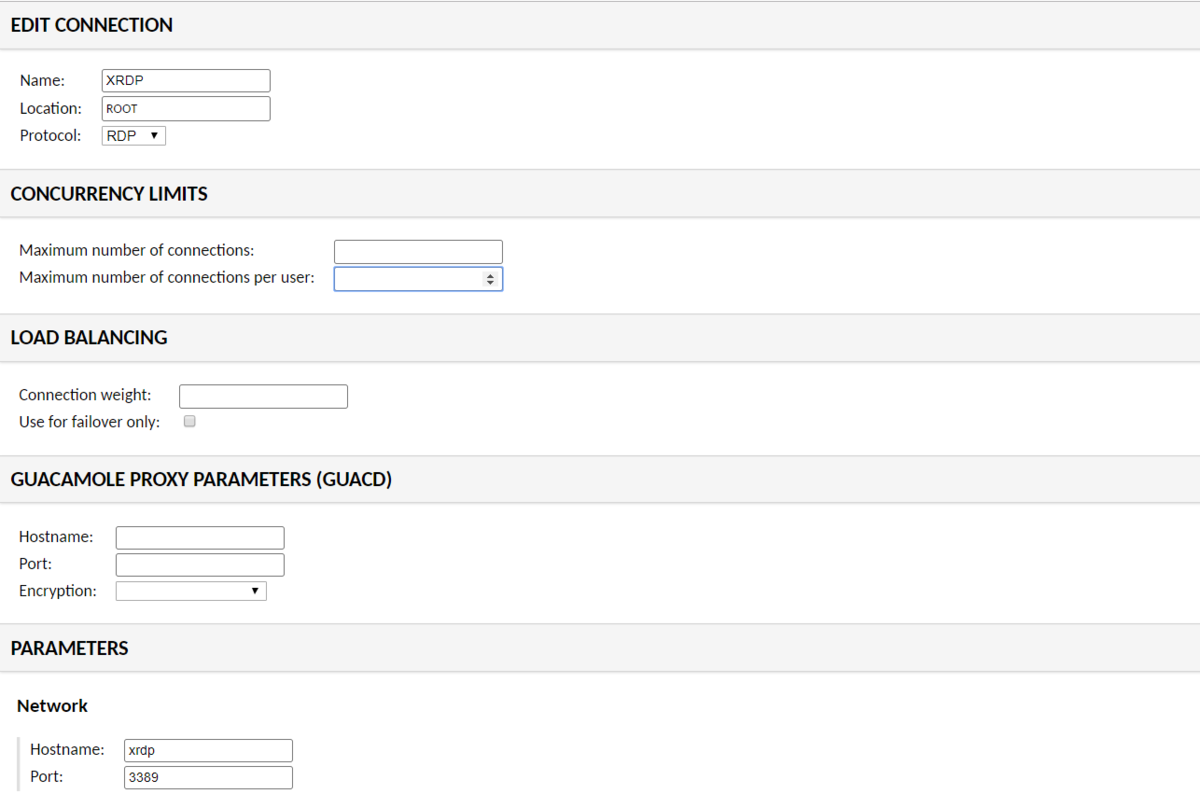
NAMEはなんでもよいですが、
PARAMETERSのHostnameにはxrdp、Portは3389を入力してください。
設定ができたら、Homeから接続します。

この画面では、XRDPをクリックします
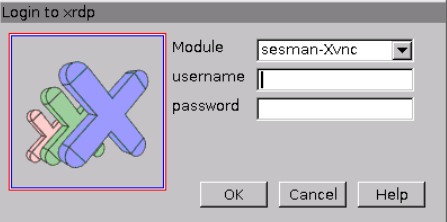
ここで先ほど作成したユーザ/パスワードを入力します。
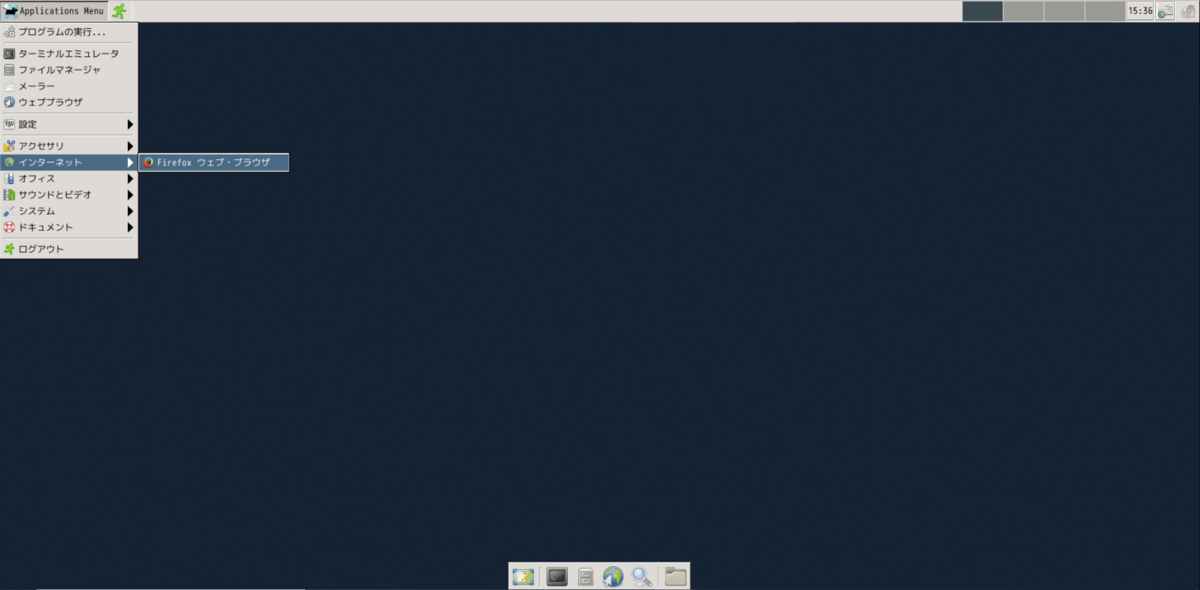
入力後、デスクトップ画面が現れます。
日本語入力はできませんが、インターネットを見ることは出来ますので、
興味がわいたら使ってみてください。
guacamoleで作るリモートゲートウェイ
Oracle Cloud Infrastructure Advent Calendar 2019
Oracle Cloud always free Advent Calendar 2019
の5日目です。
今日はリモートゲートウェイ用のソフトウェア(apache guacamole)をalways freeのComputeインスタンスに導入しようと思います。
guacamoleはWEBベースのソフトウェアなので、今回はポート58443(SSL)で公開しようと思います。guacamoleの構築が終わったら、起動済みのOracle Cloud上のWindowsインスタンス★に接続します。
★always freeではないので、あくまで動作確認用です。
まずは、Oracle Cloud側のセキュリティポートの設定です。
〇セキュリティリストの追加
oracle cloudコンソールから
ネットワーキング-仮想クラウド・ネットワーク-VirtualCloudNetwork-XXXXXXXを選択
パブリック・パブリックサブネットをクリック
Default Security List for VirtualCloudNetwork-XXXXXXXXXをクリック
イングレス・ルールに以下を追加
ソース 0.0.0.0/0
IPプロトコル TCP
宛先ポート範囲 58443
イングレス・ルールに以下を追加
ソース 10.0.0.0/24
IPプロトコル TCP
次にOracle Linux側でも同様にポート58443 を公開します。
#firewalld設定ファイルのコピー
sudo cp /usr/lib/firewalld/services/ssh.xml /etc/firewalld/services/nginx-58443.xml
sudo vi /etc/firewalld/services/nginx-58443.xml#設定ファイルの編集
#<port protocol="tcp" port="22"/>
<port protocol="tcp" port="58443"/>sudo firewall-cmd --permanent --add-service=nginx-58443
#設定のリロード
sudo firewall-cmd --reload#変更の状態確認
sudo firewall-cmd --list-all#servicesにnginx-58443があればOK
公開ポートの設定が終わったら、guacamoleを導入します。
guacamoleはdocker上で動作させることができます。
SSL化するにあたり、nginxをguacamoleのproxyサーバとして動作させます。
(guacamoleのproxyとして動作するようnginxのdockerイメージを用意しました)
最初にDB初期化用のsqlファイルを出力します。
sudo docker run --rm guacamole/guacamole /opt/guacamole/bin/initdb.sh --mysql > initdb.sql
次にdocker-compose用のymlファイルを作成します。
cat <<EOF > docker-compose.yml
version: '3'
services:
nginx:
image: s4ragent/nginx:latest
container_name: nginx
hostname: nginx
ports:
- '58443:443'
guacd:
image: guacamole/guacd:latest
container_name: guacd
hostname: guacd
expose:
- '4822'
guacamole:
image: guacamole/guacamole:latest
container_name: guacamole
hostname: guacamole
ports:
- '8080:8080'
environment:
MYSQL_HOSTNAME: 'mysql'
GUACD_HOSTNAME: 'guacd'
MYSQL_DATABASE: 'guachamole'
MYSQL_USER: 'guachamole'
MYSQL_PASSWORD: 'guachamole'
mysql:
image: mysql:5.7
container_name: mysql
hostname: mysql
environment:
MYSQL_ALLOW_EMPTY_PASSWORD: 'yes'
MYSQL_DATABASE: 'guachamole'
MYSQL_USER: 'guachamole'
MYSQL_PASSWORD: 'guachamole'
volumes:
- './initdb.sql:/docker-entrypoint-initdb.d/initdb.sql:z'
EOF
docker-compose.ymlファイルが用意できたら、コンテナを起動します。
sudo /usr/local/bin/docker-compose up -d
Creating network "opc_default" with the default driver
Creating mysql ... done
Creating nginx ... done
Creating guacd ... done
Creating guacamole ... done
作成が完了したら以下のURLにアクセスします。
https://computeインスタンスのIP:58443/guacamole/

初期パスワードはguacadmin/guacadminです。
Settings-> Preferences でまずはパスワードを変更しましょう。

パスワードを変更したらWindowsインスタンスに接続する設定を作成します。
Settings-> connectionから作成します。
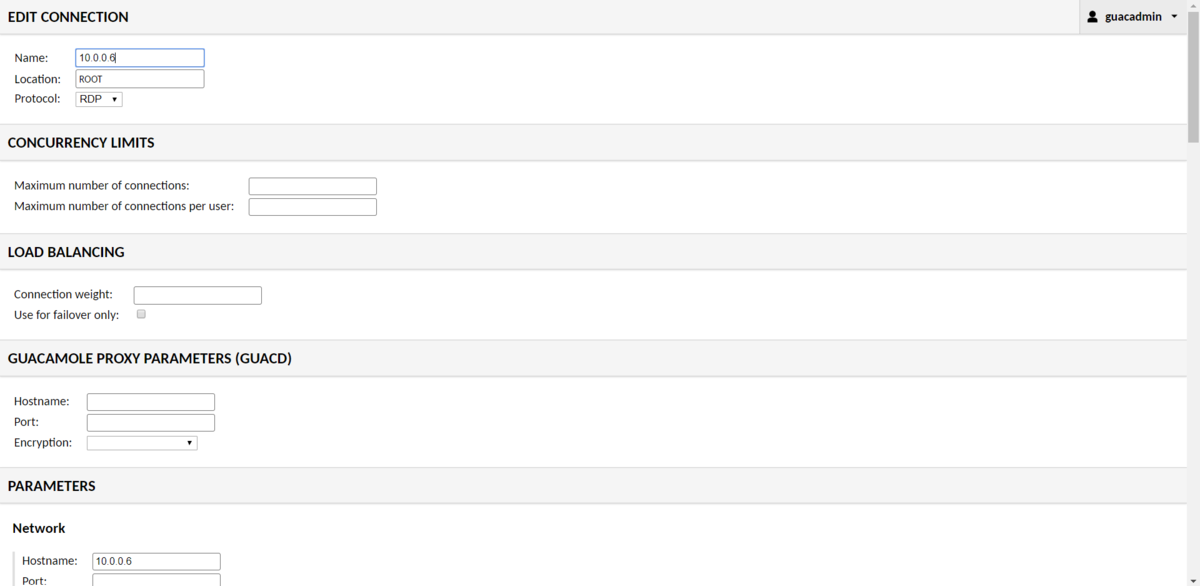

設定が終わったらHomeから接続します。

画面上の10.0.0.6をクリックするとWindowsインスタンスへの接続が始まります。
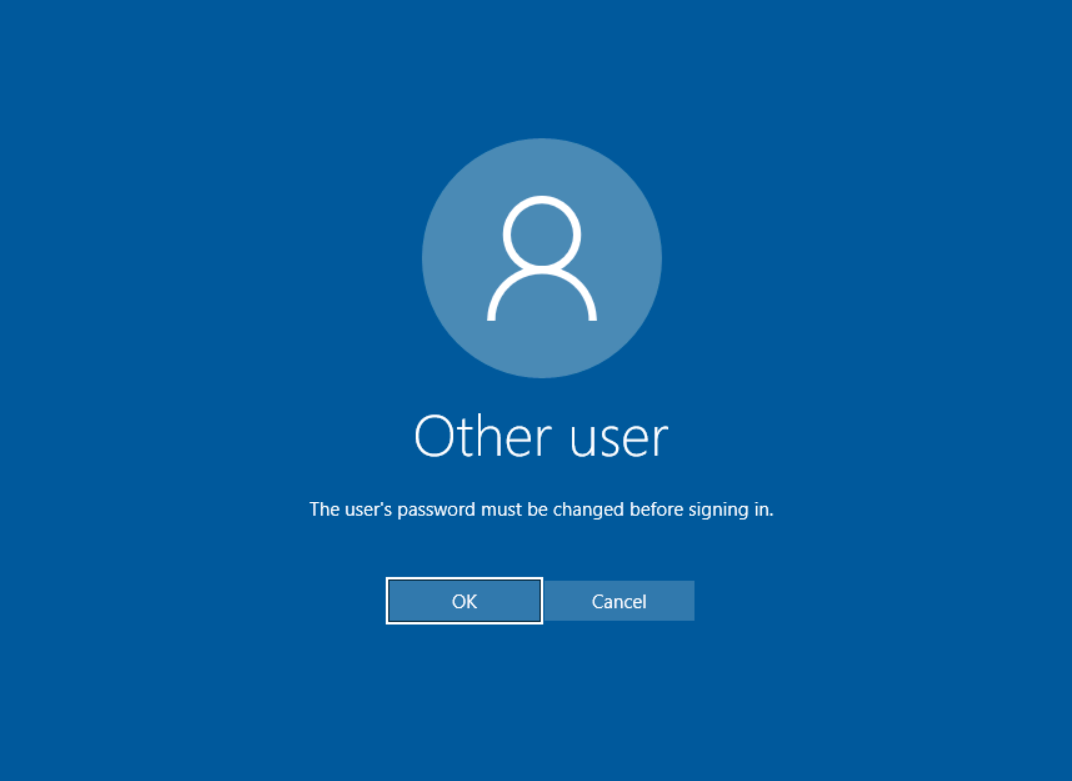

今回はRDP接続を紹介しましたが、SSHやVNC,TELNETなども使用できます。
非常に便利なので、ぜひ使ってみてください。
<参考文献>
ブラウザ経由で Windows Server にリモート接続ができる「Apache Guacamole」を Docker Compose で起動する - kakakakakku blog
docker-composeで作成されるものの名前を明示的に指定する方法 - Qiita
always freeにdockerをいれてみる
Oracle Cloud always free Advent Calendar 2019の4日です。
今回は特に地味で申し訳ないのですが、Docker/Docker Composeのインストール方法を毎回ググって確認しているので、記載することにします。対象はOracle 7.7です。(CentOSでも同じだと思います)
#Dockerのインストール/サービス有効化/起動/ユーザへの権限付与
sudo yum -y install docker-engine
sudo systemctl enable docker
sudo systemctl start docker
sudo usermod -aG docker $USER#SELINUX無効化(石川さんごめんなさい)
sudo sed -i "s/\(^SELINUX=\).*/\1disabled/" /etc/selinux/config#再起動
sudo reboot
#動作確認
docker run --rm ubuntu:14.04 /bin/echo 'Hello world'
#Hello worldと表示されればOK
#Docker Composeのインストール
sudo curl -L https://github.com/docker/compose/releases/download/1.22.0/docker-compose-`uname -s`-`uname -m` -o /usr/local/bin/docker-compose
sudo chmod +x /usr/local/bin/docker-compose
ざっとですが以上です。
always freeでunixbenchをとってみる
Oracle Cloud always free 2019 Advent Calendar 2019の3日目です。
1日目では各種コマンドから分かる内容を記載しましたが、本日はCPUベンチマークをとってみようと思います。
ベンチマークツールにunixbenchを使います。
#必要なモジュールのインストール
sudo yum install make gcc perl perl-Time-HiRes git
#unixbenchのインストール
git clone https://github.com/kdlucas/byte-unixbench.git
unixbenchの実行
cd byte-unixbench/UnixBench/
$ ./Runmake[2]: Nothing to be done for `programs'.
make[2]: Leaving directory `/home/opc/byte-unixbench/UnixBench'
make[1]: Leaving directory `/home/opc/byte-unixbench/UnixBench'
sh: 3dinfo: command not found# # # # # # # ##### ###### # # #### # #
# # ## # # # # # # # ## # # # # #
# # # # # # ## ##### ##### # # # # ######
# # # # # # ## # # # # # # # # #
# # # ## # # # # # # # ## # # # #
#### # # # # # ##### ###### # # #### # #Version 5.1.3 Based on the Byte Magazine Unix Benchmark
Multi-CPU version Version 5 revisions by Ian Smith,
Sunnyvale, CA, USA
January 13, 2011 johantheghost at yahoo period com------------------------------------------------------------------------------
Use directories for:
* File I/O tests (named fs***) = /home/opc/byte-unixbench/UnixBench/tmp
* Results = /home/opc/byte-unixbench/UnixBench/results
------------------------------------------------------------------------------1 x Dhrystone 2 using register variables 1 2 3 4 5 6 7 8 9 10
1 x Double-Precision Whetstone 1 2 3 4 5 6 7 8 9 10
1 x Execl Throughput 1 2 3
1 x File Copy 1024 bufsize 2000 maxblocks 1 2 3
1 x File Copy 256 bufsize 500 maxblocks 1 2 3
1 x File Copy 4096 bufsize 8000 maxblocks 1
2 31 x Pipe Throughput 1 2 3 4 5 6 7 8 9 10
1 x Pipe-based Context Switching 1 2 3 4 5 6 7 8 9 10
1 x Process Creation 1 2 3
1 x System Call Overhead 1 2 3 4 5 6 7 8 9 10
1 x Shell Scripts (1 concurrent) 1 2 3
1 x Shell Scripts (8 concurrent) 1 2 3
2 x Dhrystone 2 using register variables 1 2 3 4 5 6 7 8 9 10
2 x Double-Precision Whetstone 1 2 3 4 5 6 7 8 9 10
2 x Execl Throughput 1 2 3
2 x File Copy 1024 bufsize 2000 maxblocks 1 2 3
2 x File Copy 256 bufsize 500 maxblocks 1 2 3
2 x File Copy 4096 bufsize 8000 maxblocks 1 2
Hyper-Threading, x86-64, MMX, AMD MMX, Physical Address Ext, SYSENTER/SYSEXIT, SYSCALL/SYSRET
02:32:14 up 18:07, 2 users, load average: 0.17, 0.20, 0.15; runlevel 2019-11-14------------------------------------------------------------------------
Benchmark Run: Fri Nov 15 2019 02:32:14 - 03:00:12
2 CPUs in system; running 1 parallel copy of testsDhrystone 2 using register variables 12136071.4 lps (10.0 s, 7 samples)
Double-Precision Whetstone 1806.8 MWIPS (9.8 s, 7 samples)
Execl Throughput 1349.5 lps (30.0 s, 2 samples)
File Copy 1024 bufsize 2000 maxblocks 291074.3 KBps (30.0 s, 2 samples)
File Copy 256 bufsize 500 maxblocks 81481.6 KBps (30.0 s, 2 samples)
File Copy 4096 bufsize 8000 maxblocks 827083.9 KBps (30.0 s, 2 samples)
Pipe Throughput 471659.7 lps (10.0 s, 7 samples)
Pipe-based Context Switching 22063.5 lps (10.0 s, 7 samples)
Process Creation 2229.4 lps (30.0 s, 2 samples)
Shell Scripts (1 concurrent) 2043.0 lpm (60.0 s, 2 samples)
Shell Scripts (8 concurrent) 315.3 lpm (60.0 s, 2 samples)
System Call Overhead 666622.7 lps (10.0 s, 7 samples)System Benchmarks Index Values BASELINE RESULT INDEX
Dhrystone 2 using register variables 116700.0 12136071.4 1039.9
Double-Precision Whetstone 55.0 1806.8 328.5
Execl Throughput 43.0 1349.5 313.8
File Copy 1024 bufsize 2000 maxblocks 3960.0 291074.3 735.0
File Copy 256 bufsize 500 maxblocks 1655.0 81481.6 492.3
File Copy 4096 bufsize 8000 maxblocks 5800.0 827083.9 1426.0
Pipe Throughput 12440.0 471659.7 379.1
Pipe-based Context Switching 4000.0 22063.5 55.2
Process Creation 126.0 2229.4 176.9
Shell Scripts (1 concurrent) 42.4 2043.0 481.8
Shell Scripts (8 concurrent) 6.0 315.3 525.5
System Call Overhead 15000.0 666622.7 444.4
========
System Benchmarks Index Score 410.7------------------------------------------------------------------------
Benchmark Run: Fri Nov 15 2019 03:00:12 - 03:28:20
2 CPUs in system; running 2 parallel copies of testsDhrystone 2 using register variables 14044499.3 lps (10.0 s, 7 samples)
Double-Precision Whetstone 2050.7 MWIPS (9.9 s, 7 samples)
Execl Throughput 1827.5 lps (29.9 s, 2 samples)
File Copy 1024 bufsize 2000 maxblocks 318033.4 KBps (30.0 s, 2 samples)
File Copy 256 bufsize 500 maxblocks 87118.8 KBps (30.0 s, 2 samples)
File Copy 4096 bufsize 8000 maxblocks 919732.0 KBps (30.0 s, 2 samples)
Pipe Throughput 534172.6 lps (10.0 s, 7 samples)
Pipe-based Context Switching 93540.3 lps (10.0 s, 7 samples)
Process Creation 3884.0 lps (30.1 s, 2 samples)
Shell Scripts (1 concurrent) 1971.0 lpm (60.1 s, 2 samples)
Shell Scripts (8 concurrent) 347.6 lpm (60.2 s, 2 samples)
System Call Overhead 751110.5 lps (10.0 s, 7 samples)System Benchmarks Index Values BASELINE RESULT INDEX
Dhrystone 2 using register variables 116700.0 14044499.3 1203.5
Double-Precision Whetstone 55.0 2050.7 372.8
Execl Throughput 43.0 1827.5 425.0
File Copy 1024 bufsize 2000 maxblocks 3960.0 318033.4 803.1
File Copy 256 bufsize 500 maxblocks 1655.0 87118.8 526.4
File Copy 4096 bufsize 8000 maxblocks 5800.0 919732.0 1585.7
Pipe Throughput 12440.0 534172.6 429.4
Pipe-based Context Switching 4000.0 93540.3 233.9
Process Creation 126.0 3884.0 308.3
Shell Scripts (1 concurrent) 42.4 1971.0 464.8
Shell Scripts (8 concurrent) 6.0 347.6 579.3
System Call Overhead 15000.0 751110.5 500.7
========
System Benchmarks Index Score 533.7
スコアは533.7です。
AWSのt3.microよりもスコアが低く、GCPのf1-microよりもスコアが高いようです。
<参考>
unixbenchの使い方
https://kanpapa.com/today/2018/09/nano-pi-neo-nas-unixbench.html
https://qiita.com/CloudRemix/items/f82e22b3727a88520cc3
t3.microのunixbench
https://gb-j.com/column/amazonec2-t3instance/
f1-microのunixbench
https://www.m0de.ml/c0d3man/posts/l8vt274k36520n9woxsl/
Computeインスタンスのsshポート変更(2日目)
Oracle Cloud always free Advent Calendar 2019の二日目です。
always freeのcomputeインスタンスですが、基本起動しっぱなしです。
SSH接続は秘密鍵での認証されていますが、それだけでは心元ないので、SSH接続のポートを変えることにします。
以前ポート22のままサーバを運用していた時に猛烈にアタックを受けたことがあり、軽くトラウマになっています。
今回はssh の待ち受けポートを22から54222に変更するために必要なセキュリティ設定を行い、その後、ssh待ち受けポートを変更します。
失敗するとコンソール接続しか出来なくなるので注意してください。
Firewalledの設定変更
#firewalldの受信ポート(54222)追加
sudo cp /usr/lib/firewalld/services/ssh.xml /etc/firewalld/services/ssh-54222.xml
sudo vi /etc/firewalld/services/ssh-54222.xml#<port protocol="tcp" port="22"/>
<port protocol="tcp" port="54222"/>sudo firewall-cmd --permanent --add-service=ssh-54222
#設定のリロード
sudo firewall-cmd --reload#変更の状態確認
sudo firewall-cmd --list-all#servicesにssh-54222があればOK
#sshdのポート番号変更
sudo vi /etc/ssh/sshd_config
# Port 22
Port 54222
#セキュリティリストの追加
oracle cloudコンソールから
ネットワーキング-仮想クラウド・ネットワーク-VirtualCloudNetwork-XXXXXXXを選択
パブリック・パブリックサブネットをクリック
Default Security List for VirtualCloudNetwork-XXXXXXXXXをクリック
#イングレス・ルールに以下を追加
ソース 0.0.0.0/0
IPプロトコル TCP
宛先ポート範囲 54222
#変更したポートで接続できることを確認
#別のコンソールから接続する。
#firewalldの設定からポート22を削除
sudo firewall-cmd --permanent --remove-service=ssh#設定のリロード
sudo firewall-cmd --reload#変更の状態確認
sudo firewall-cmd --list-all#servicesにsshがなければOK
ポートを変えるだけでアタックの頻度はかなり下がります。